shinetime09
14192
49
2

After Pic...as is tradition.
The renovation lasted from April 2020 -> May 2022. 2 years of slowly designing, procuring supplies and building all on my own. The Covid lockdowns and shift to work from home gave me a lot of time to stare at my old deck and figure out what I wanted to do. Follow along for the 5 phase implementation that turned into quite the expensive DIY renovation...but the end result is quite satisfying. I chose the longest lasting, lowest maintenance products to ensure it will last a very long time.

Before Pic.
Biggest issue that started the waterfall of "Might as wells" was the top deck board paint deteriorating, rotted boards and exposed nail heads. I tried to band-aid the deck boards temporarily by applying the Rustoleum 6X Deck restoring paint, but knew it was only a matter of time until that would fail. Second issue was the stairs out to the backyard were on the side of the deck...and I thought it would be nicer to be able to go straight out to the backyard. I have 2 small kids and the stairs on the side made the deck feel separate from the backyard. Third issue was privacy and our neighbors being able to see right across at us.
All these issues translated into a 5 phase renovation...

The 5 Phase Renovation:
1.) Privacy Wall
2.) 10ft. Wide Walk Out Steps
3.) Composite Deck Board Replacement
4.) Cable Handrail
5.) Stone Walkway
These phases were executed in order and roughly took 3-6 months each.
As far as designing, I like to design and model everything in 3D CAD. This may take longer but it helps me work through most build/assembly issues. It also helps itemize all the components I need to purchase and eliminates wasted material.
I also like to create a "design board" PowerPoint to collect all the ideas I pull from the internet and YouTube. I tend to steal a little bit from multiple sources to arrive at what I like. This PowerPoint keeps my ideas organized and also lets me share them easily with my wife, to get my once over approval.
Next, I will quickly run through each phase.

1.) Privacy Wall
Made with Redwood Cedar. Cut down 1x4x12ft boards into the three sections shown. Ripped some of those boards in half to create the skinnier pieces. Mounted to 4x4 posts with deck screws that were secured to the deck outer frame. Covered seems on front with 1x4 trim pieces and air nailed on stainless steel outdoor finish nails. Finished wood surface with Penofin Oil Finish.

1.) Privacy Wall
Mounted 4x4's to outside deck frame using long lag bolts and Simpson Strong Tie Tension Ties. Needed to add some blocking underneath for added support.

2.) 10ft. Wide Walk Out Steps
Added ledger board to existing deck frame to mount stair stringers to using 4x4's and GRK structural screws. Also researched local codes for deck posts and how deep the concrete stair footer needed to be. My local code said footers needed to be 36" deep to be below the frost line...which is a lot of concrete for this ultra wide stair case footer I was trying to build. In an effort to not take the entire rectangular footer down 36", I decided to just make 4 cylindrical footers go down that deep and connect it to the rectangular pad with rebar.

2.) 10ft. Wide Walk Out Steps
Concrete footer frame with 4 post holes down to 36" ready to be poured. Used outside stringers to help layout where the wooden frame would need to end up so the finished pad is level and at the right height.

2.) 10ft. Wide Walk Out Steps
Pouring Concrete. We rented a concrete mixer from HD to help mix all the concrete bags. This was a huge help and was pretty cheap. Definitely recommend.

2.) 10ft. Wide Walk Out Steps
Pad Poured. Kids signatures added.

2.) 10ft. Wide Walk Out Steps
Stringer base boards mounted to Concrete pad with 4" concrete anchors with washers.

2.) 10ft. Wide Walk Out Steps
Stringers cut individually with circular saw and mounted to ledger board with stringer hangers 12" on center. Composite board manufacturer(TimberTech) recommends 12" OC for steps. Stringers also toe screwed into base boards.

2.) 10ft. Wide Walk Out Steps
Stringers attached. Blocking added to ends for handrail to mount and also picture framing of ends required more surface to mount to. TimberTech Joist Tape added to top surface to lengthen the life of the pressure treated wood under the composite.
Looking back I wish I would of taken more time to verify all the stringers were level and on the same plane. Once I mounted the steps, there was a definite wave to certain sections of the steps. Oh well.

2.) 10ft. Wide Walk Out Steps
Composite board treads attached with TopLoc Fasteners with plugs that color match. The composite board is TimberTech's PRO Legacy 5/4-in x 6-in Whitewash Cedar product. Very nice color and texture to it.
I designed a picture frame on the corners to prevent having ugly exposed ends. Also designed white fascia boards using 1" AZEK PVC Trim Board to completely cover the exposed pressure treated stringers. These details are not typically done by deck builders. Probably because they take a lot of extra time, but the end result is super clean.

2.) 10ft. Wide Walk Out Steps
Cutting the fascia boards for the sides of the stairs was extremely challenging. Required a lot of angles on the compound miter saw.

3.) Composite Deck Board Replacement
Ripped off old deck boards using mostly a "Deck Removal Bull Bar". Highly recommend if tearing apart a deck.

3.) Composite Deck Board Replacement
All deck boards removed and nail heads cutoff with Dewalt battery powered angle grinder. After review of the Joists, we determined that the front half of the deck was completely rotted and all the joists needed replaced.

3.) Composite Deck Board Replacement
Began replacing rotted joists one at a time and rehanging.
Marvin, the dog, observing.

3.) Composite Deck Board Replacement
All rotted joists replaced. Started blocking out middle and ends for double picture frame detail on the top deck. Again, more surface is needed to mount picture frame boards and blocking out the entire gap was the easiest approach for me.

3.) Composite Deck Board Replacement
All blocking complete for picture framing and also handrail post positions. Joist Tape added to all exposed surfaces.

3.) Composite Deck Board Replacement
Outside picture frame boards mounted with Top Loc fasteners with plugs.

3.) Composite Deck Board Replacement
Inside deck boards mounted with CONCEALoc fasteners. This hardware clips into the side grooves of the boards and has a screw hole that mounts to each stringer. These went in very easily and are nice because no screw heads are exposed. Super clean look.

3.) Composite Deck Board Replacement
Marvin showcasing the double picture frame border.

3.) Composite Deck Board Replacement
Top Deck boards complete. PVC fascia installed on deck frame.

4.) Cable Handrail
The cable handrail is the Signature Series Top Mount Modern Railing from Cable Bullet. Each post was spec'd out based on where you want the prefabricated tapped holes facing. Then the top handrail just comes in 10ft lengths and you have to cut the miter corners and use "splines" and metal screws to secure them together. I used my Miter saw with a 100 tooth finishing blade to cut the aluminum handrail. Cutting the angles on the handrail was the most nerve-racking part, since you only get one chance with metal to get it right. The stainless steel cable and hardware is very nice and running the cables is pretty easy. It requires a hand hydraulic press and a lot of patience. I really love how it turned out though.

5.) Stone Walkway
The stone walkway was added to help minimize the grass getting destroyed from kids running up the stairs and also to extend over to the old stone walkway so you can get to the side of the house. We found a 1ft x 2ft stone that fit nicely. We put down a couple inches of paver base, tamped and leveled as best we could.

5.) Stone Walkway
Walkway complete. Had to bring in some topsoil and regrade the lawn so it met up with the stone. Then planted new grass seed.

Done!
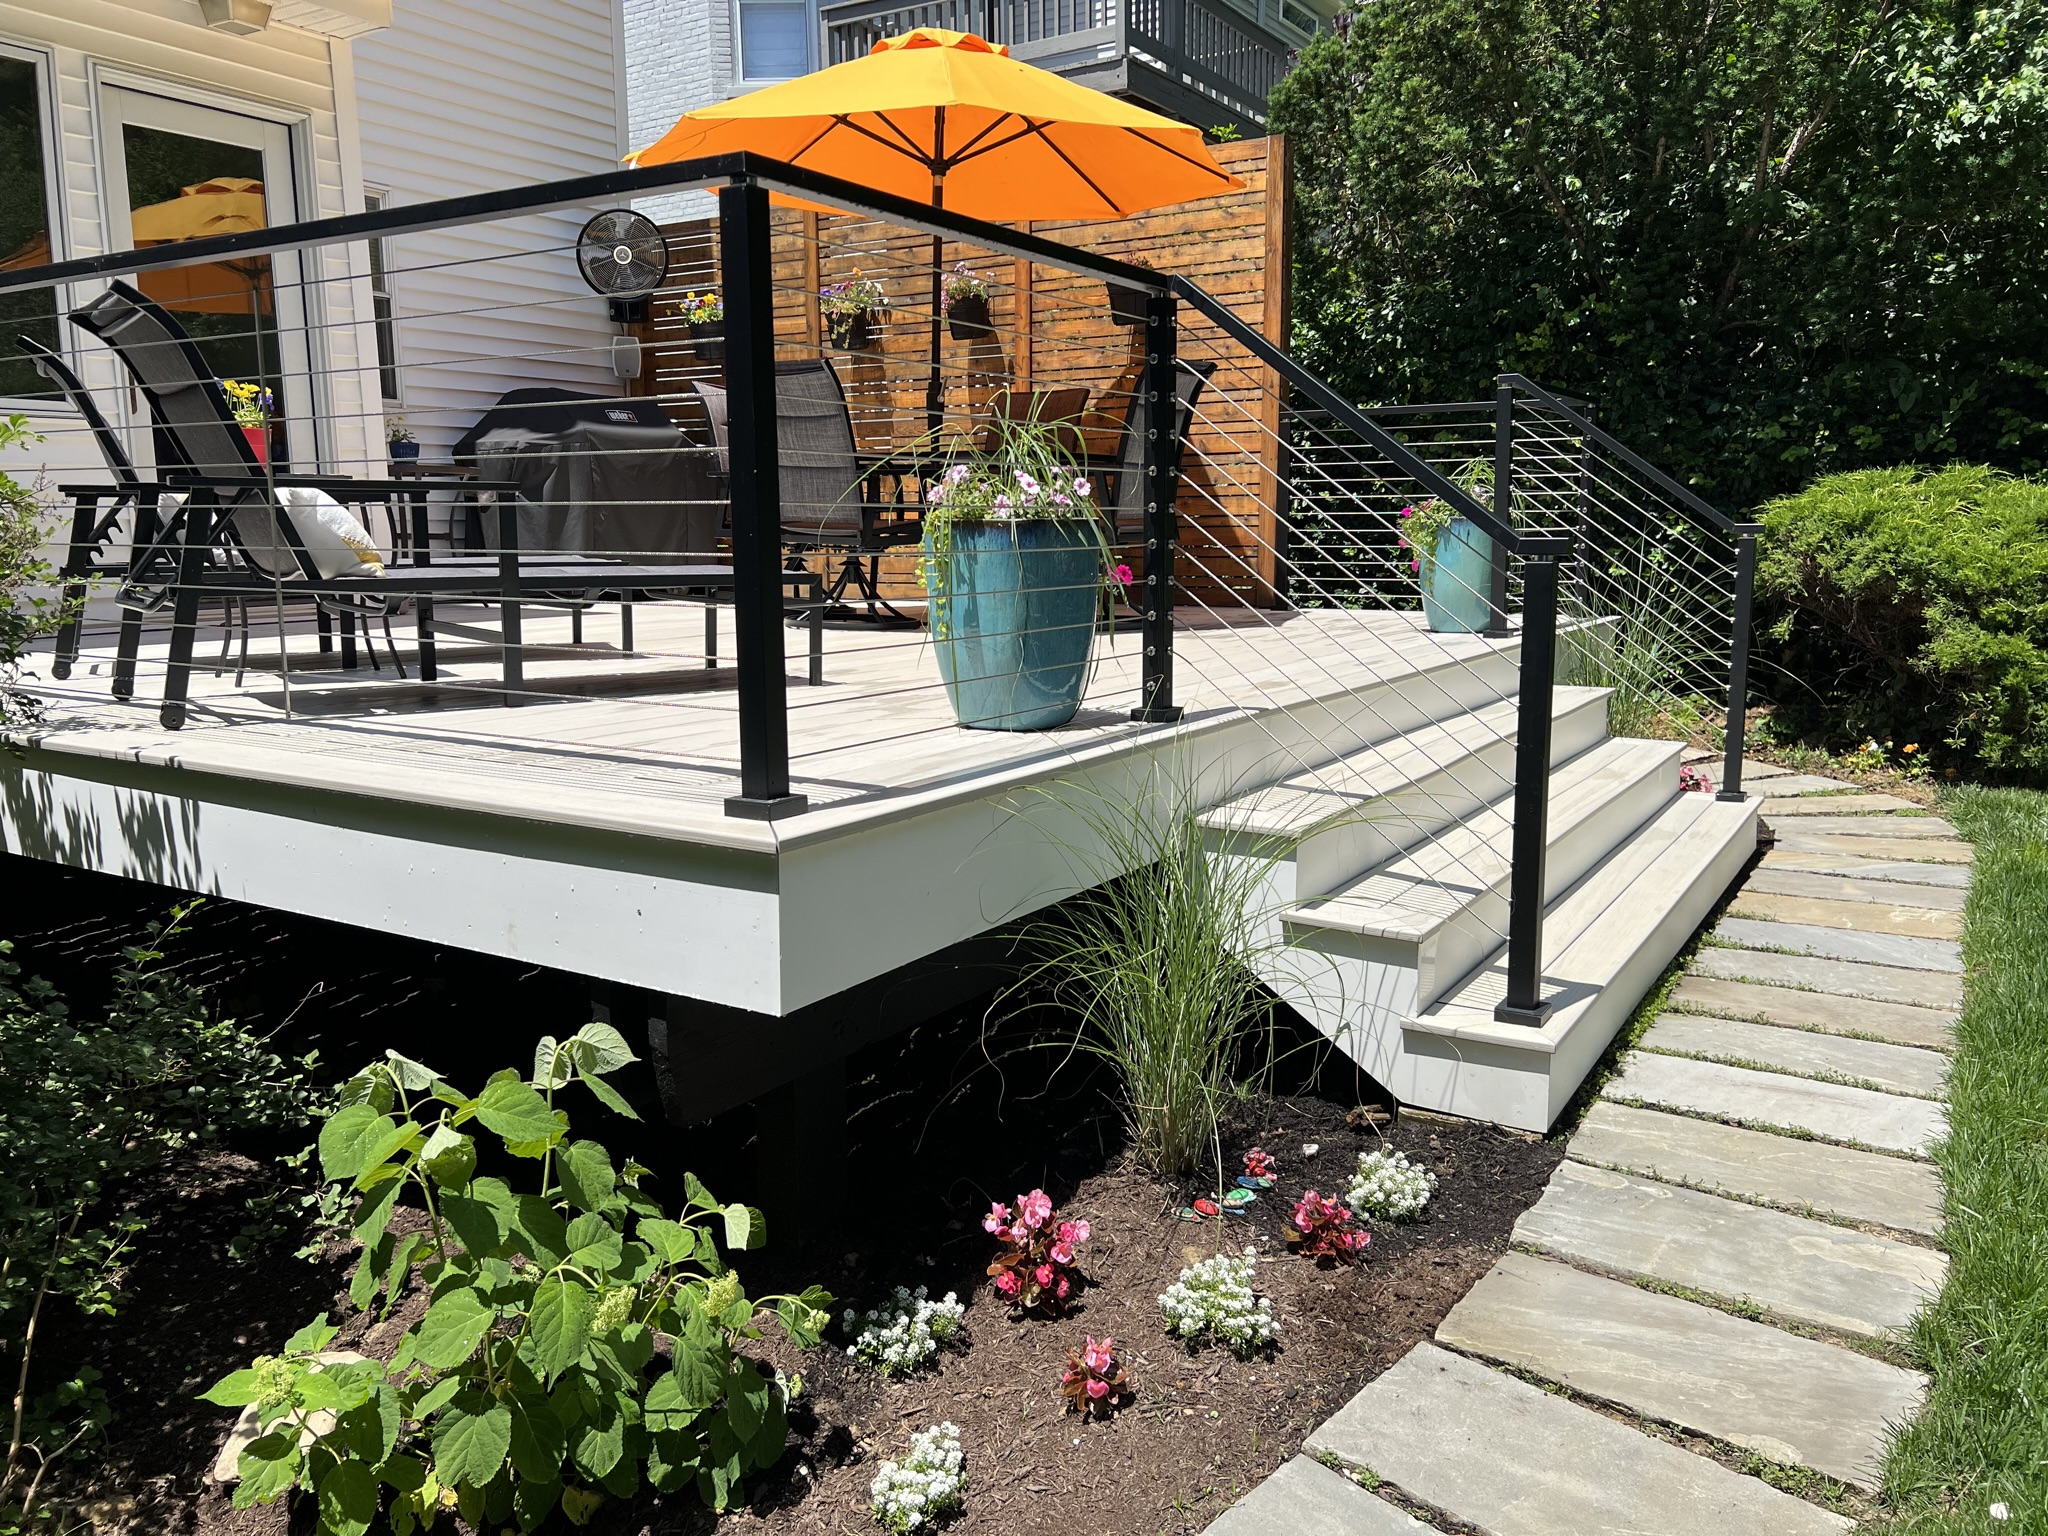
Finished pic. Outdoor oscillating fan addition was a game changer.

Finished pic.

View out to the backyard. Vision realized!
UnitConversionBot
10ft ≈ 3 metres or 5.1 washing machines
allenvasher3000
Meikhaila
Does the cement say 2021? O.o is this your OC @OP *confused*
shinetime09
Yeah…It took me 2 years to complete the entire project as stated in the first pic. Haha. Don’t need to rub it in.
Thesaya
They started in 2020, the concrete was obviously poured in '21, everything was done in '22. Time! It does not stand still!
soosybrimbram
They did say each step took a couple months so it makes sense that the concrete was poured in 2021.