Skraticus
1592
253
10
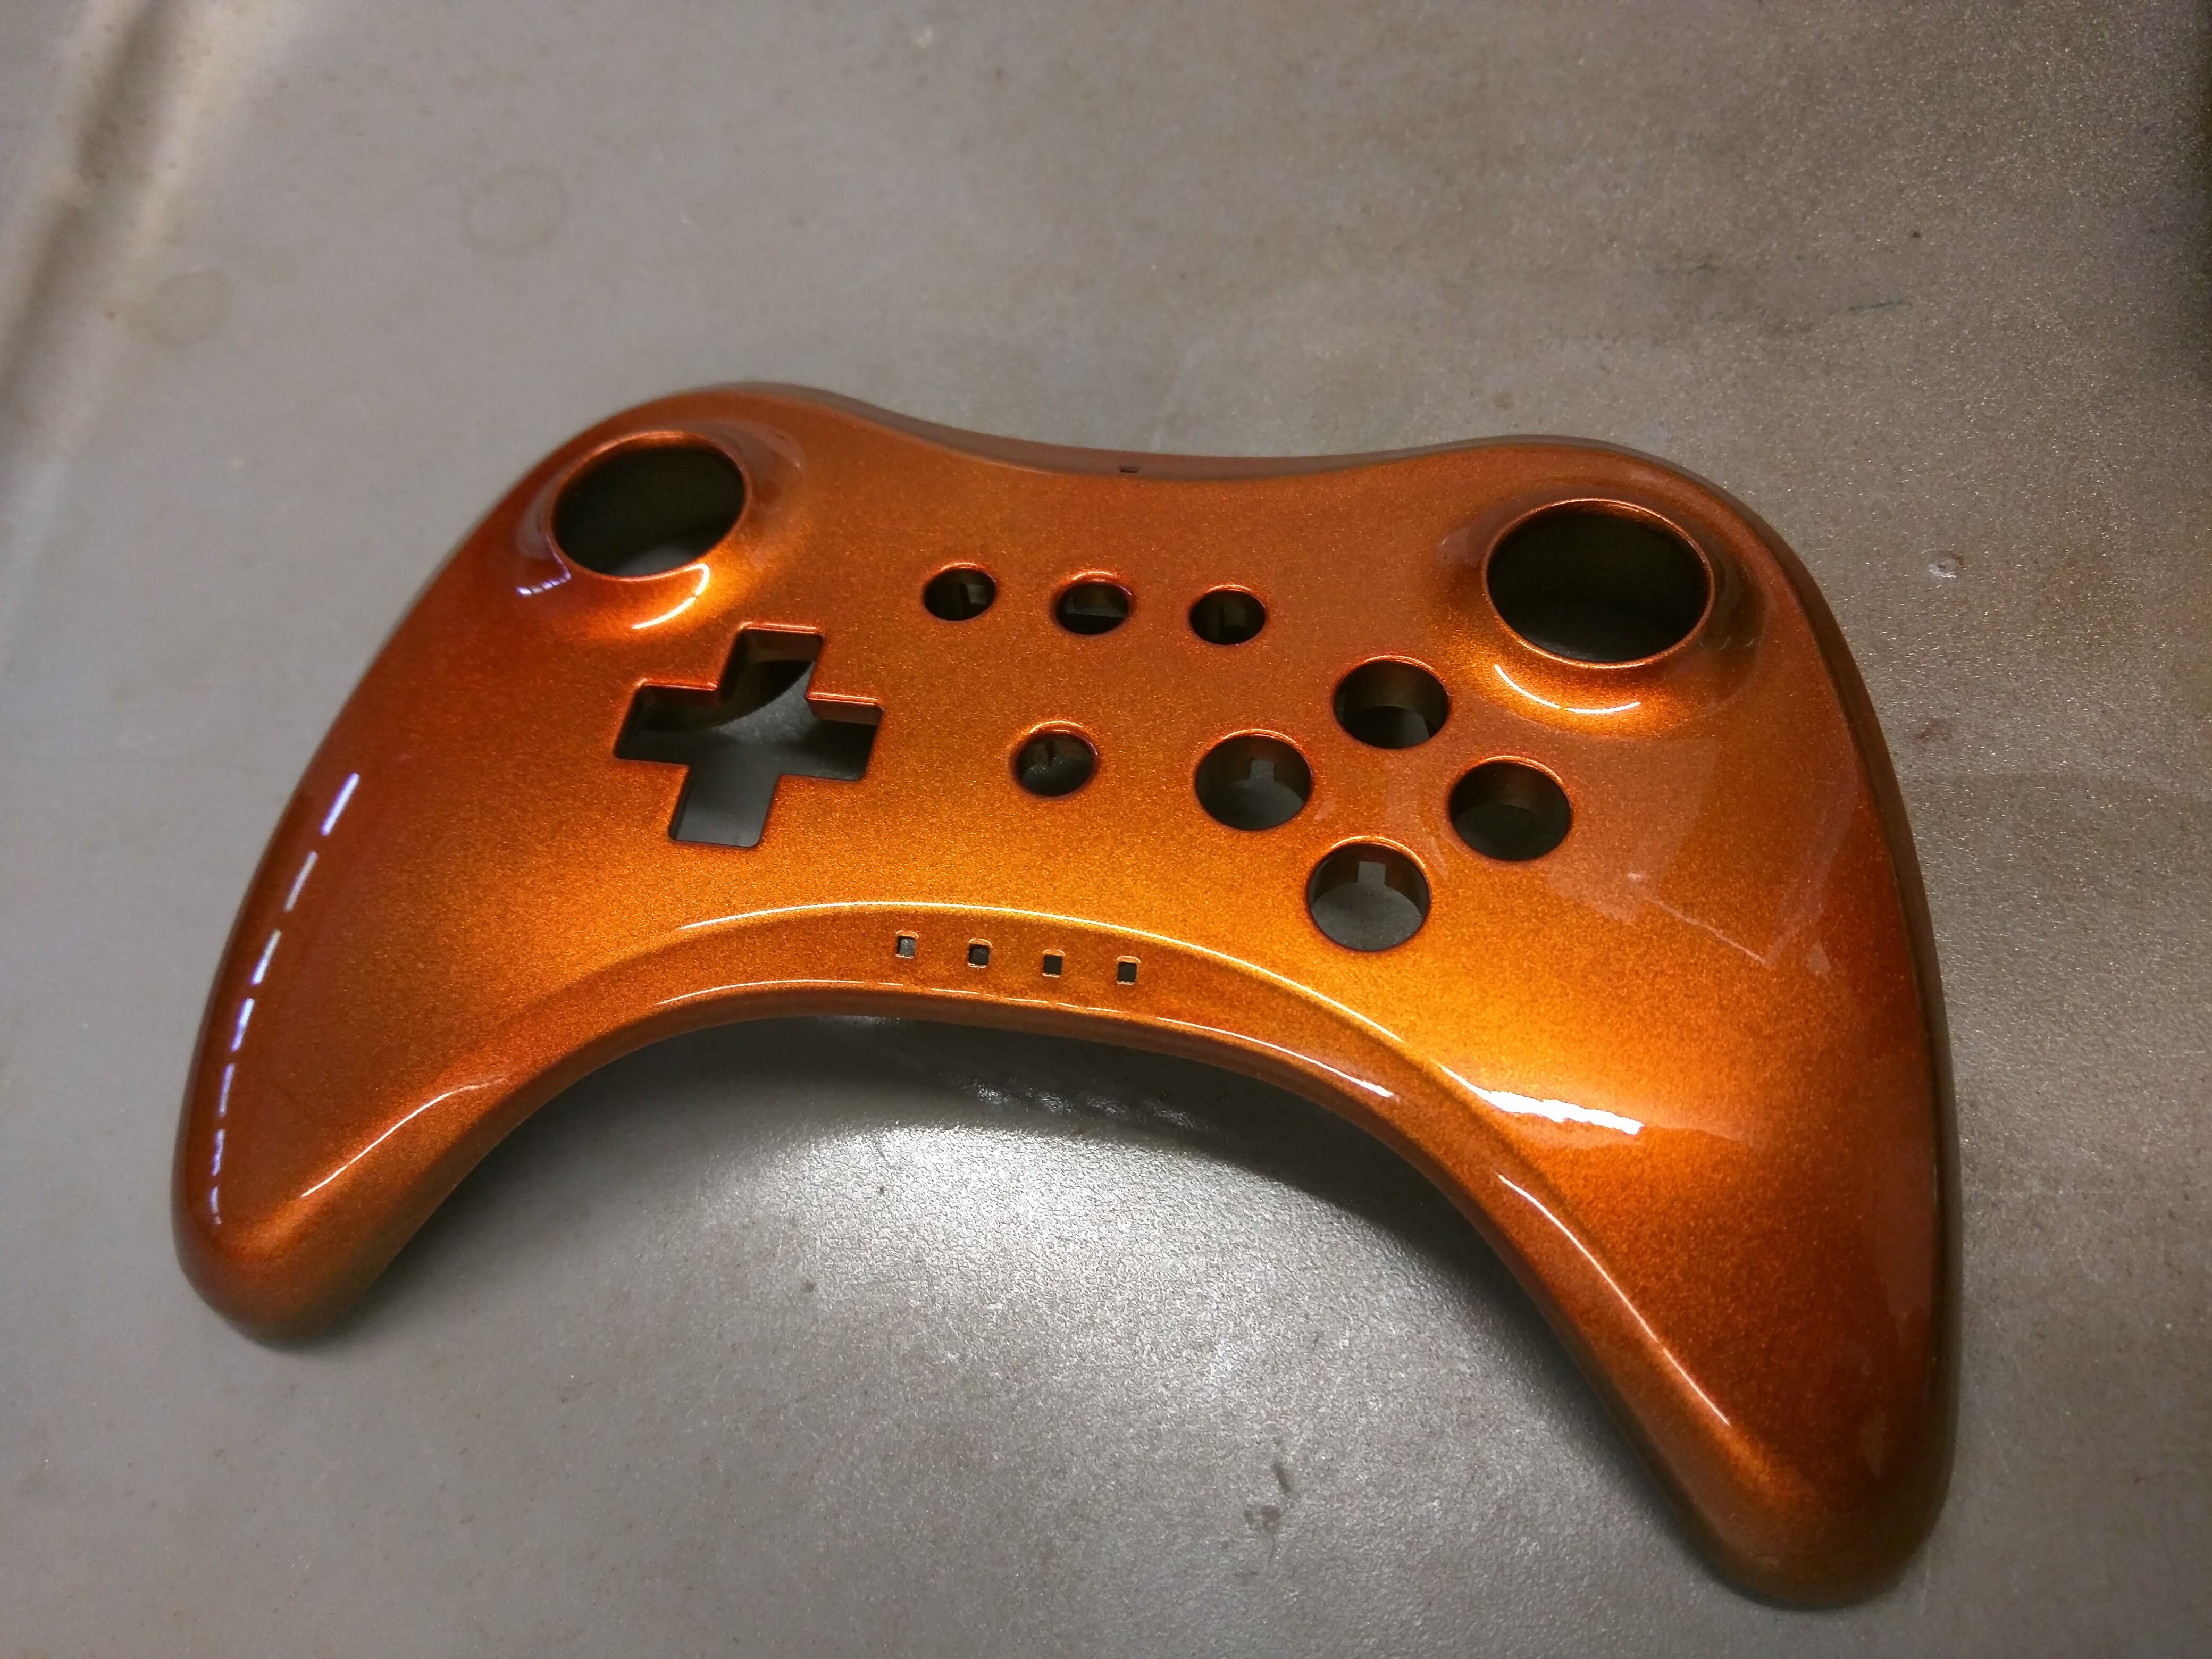
Finished product goes first, right?

This is the finished product. You can easily paint 1 controller like this for $15 - $30, depending on where you buy your goods from and how much you want to put into it. (You can do more than 1 controller without spending more money if you want the same color too)

Not a humongous fan of the Wii U, but I LOVE their controllers. I use mine on my PC as well, but got tired of re-syncing between it and the Wii U, so I bought one just for the PC.

You do have to have one of those special tri-wing screwdrivers to get inside (easily anyway).

I was scared to take apart a brand new controller at first, but it turned out to be really simple.

And I mean REALLY simple. Nintendo designed this in such a way that you can't put anything in the wrong place. It's actually really awesome. Probably sped up production a great deal and reduced mistakes in the assembly line.

All you need is one tri-wing screwdriver and one Phillips screwdriver. The needle nose there I was just using to grab small pieces because my hands are shaky and tend to drop small things.

This is what it looks like after it's been thoroughly scuffed with a green scotch brite pad. Really a red would have been better, but I had a huge box of green to use.

Remember, light pressure when you're sanding! Don't dig in.

And ALWAYS sand/scuff the opposite direction your fingers are pointing. For example. if you're holding your pad/sandpaper and your fingers are pointing forward, sand/scuff from side to side. This keeps from digging into your material and leaving deep gouges. You also sand more area this way, so it's faster!

Laying down some metallic silver for the base color.

I put 1 dry/light coat to start, then one heavy coat.

First layer of the orange, notice how thin and transparent it is. You can see how the layers add up from where it collected more in spots that got hit repeatedly.

The second controller was an experiment, trying some new paints from Hobby Lobby. It's very pretty, but I wasn't a fan of it's performance.

Three pieces getting painted, had to do the fourth later. And yes, I know, the garage is a mess. A dog went crazy in there beforehand and got in the trash. Receipts and paper everywhere. I'm still finding bits and pieces.
3-4 coats of the orange later, starting to settle in nicely.

Only 2 or 3 coats of this stuff. Like I said, it looks good, but it's performance and quality wasn't worth the price.

Look proud in the spotlight!

You too Mr. Green.

Better lighting. If you take these outside, they look REALLY nice. But who plays video games outside?


And the back! Decided to leave that piece untouched.

And there you have it! Like I said before, this is really easy to do. You use a metallic silver as a base, 2 coats is plenty. Then you pick a transparent paint you want and layer it (light coats) until you have the color you want. Make sure you wait long enough between coats for it to dry properly to keep from loading it down too much. Then you can top it with some clear coat if you want. Here a breakdown of what I used:
I already had tools, but Amazon has a tool just for this if you want to be cheap:
http://www.amazon.com/DS-Tri-Wing-Triwing-Screwdriver-Nintendo-6304900/dp/B000VPBYS6/ref=sr_1_1?ie=UTF8&qid=1461521549&sr=8-1&keywords=triwing+screwdriver
This is my Tri-Wing kit. Just a few bucks more really, and they're very nice:
http://www.amazon.com/Eclipse-SD-081G-Tri-Wing-Precision-Screwdriver/dp/B019OXR65U/ref=sr_1_7?ie=UTF8&qid=1461521549&sr=8-7&keywords=triwing+screwdriver
As for the paint, your base can either be Rustoleum or Valspar spray paints from Lowe's or Wal-Mart, wherever you do your shopping.
This is the orange (which you can also get at Autozone):
http://www.amazon.com/Dupli-Color-MC205-Orange-Metal-Anodized/dp/B00099BJVQ/ref=sr_1_2?ie=UTF8&qid=1461521642&sr=8-2&keywords=orange+metallic+spray+paint
Make sure you get the "anodized" stuff they have, that's the really thin and transparent paints.
Then clear coat is also Rustoleum or Valspar spray paints.
As for the green, I got it from Hobby Lobby. It's a brand called "Testor" and I wasn't impressed. It's a ridiculously small can and it costs just as much as a normal sized one. Also, it was very bad about "spitting" whenever you sprayed, meaning some heavy drops would get flung from the spray tip and splatter on your work. Not good! Also, and worst part, it did NOT play well with the clear coat at all.
Hope you enjoyed it, and maybe it helped someone thinking about painting their own controllers. It's cheap and not very difficult. 1 can of spray paint is about 6 bucks, and the clear coat is optional.
And in case you were wondering which controller goes to what, the orange is for the Nintendo. Because you know, Samus's suit color. That's the look I was going for anyway.
EverydayIdleness
These really do look nice. Good work.
wherethehorriblethingsare
Ooh, I'll try making something now.
timmithy3000
Well done!
Galaktia
+1 for finished product first
sketchinbawlz
Not a gamer, but when did wii start making a controller that looked like a xbox/ps controller? What happened to those remote things they had
kantackistan
They both work, depending on the software. No point in making 4-to-8 player games if you don't have enough controllers for everyone.
iupvotebadcomments
Way to ruin a perfectly good step ladder, j/k, these are awesome!
Skraticus
The ladder still works, it just works with a little bit of flare now!
HowComeThisIsAFeature
This is a repost. He did not do a thing!
HowComeThisIsAFeature
Just kidding, ben is the best.
Skraticus
-_-
MapsAreFlatSoTheEarthIsFlatCheckmateAthiests
Great idea! I'll likely do this with other controllers, though I might use a similar black/silver on the bottom, and a color with the top.
Skraticus
Be careful with black. Black and transparent colors are tricky. It also needs to be metallic as well. This orange on stock black = no change
MapsAreFlatSoTheEarthIsFlatCheckmateAthiests
Ah, the tip is appreciated! Looks like I'll do a bit of reading on technicalities first.
Skraticus
no prob! silver, gold, copper orange are good base colors. Shoot me a message if ye need help.
kantackistan
Fantastic work @OP! Though I've never heard I could use mine on the PC. Is that something easy to set up?
Skraticus
Sure is. Shoot me a PM as a reminder and I'll give you a couple links. Not at home at the moment
Pauun
Have you painted the console a matching colour as well?
Skraticus
Ha! No, like I said, I was scared enough to crack open the controller. It's tempting though .... Very tempting.
Pauun
Should, the console would be easier than the controllers